
Endacopia Items & Inventory Guide
Endacopia uses a small but critical inventory. Most progression items live in fixed locations, so this page doubles as a known-item reference. Pair it with the Walkthrough page for the chapter where each item is used.
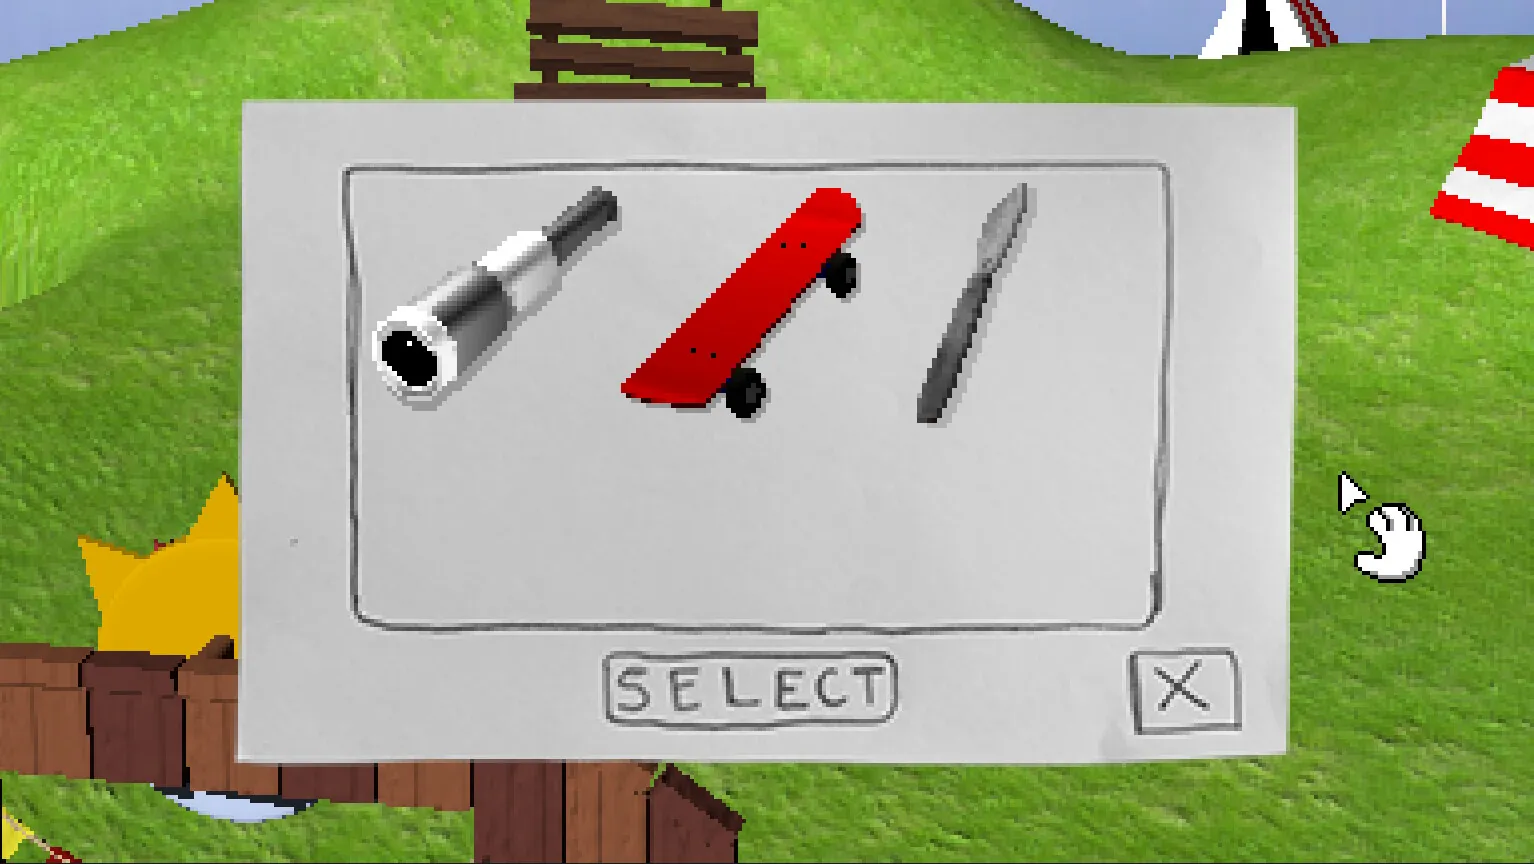
Inventory Interaction Model
To open the inventory, click on Mellow with the Interact cursor equipped. Items can pop up automatically (such as the telescope and metal detector); others need to be selected and clicked on the relevant target. There is no inventory weight limit; you carry every relevant item at once.
Puzzle items are not consumed. You can return the wrench, the transparent mug, or the VHS tape to Mellow's inventory after their first use, which lets later branches reuse them.
Three pointer-confirmed rules:
- Right-click to cycle through Observe, Talk, and Interact modes.
- Left-click once to use the equipped action on the highlighted target.
- Click on Mellow himself to open and select items; the cursor will show a tiny icon of the selected item next to it.
Item Reference Table
| Item | Where obtained | Where used | What it enables |
|---|---|---|---|
| Scalpel | Whack-a-Mole booth, Misery Town (Chapter 1) | Medical Tent and Trapezist fight | Operation-style mini-game and the Trapezist pacifist skip |
| Red Ball | Medical Tent at the end of the scalpel mini-game | Misery Town porta-potty score card | Bingo prize + Boon the inflatable insult chain |
| Core Key | Dropped from the office water cooler after using the wrench on it | Office core room | Office core door clearance |
| Floppy Disk | Henry's profile mirror room (Chapter 2) | Doors.exe on the upstairs computer | Doors 3 and 4 sequence, including the climbing wall and the saw-box code 471 |
| Hand Saw | Attic trunk after using the saw-box code on the lock | Returned to the Toilet | Determines the Ending A vs Ending B branch |
| Telescope | Yellow party at Paisley's condo | Timesville beach / shed / dock | Star constellation unlock for the shed (skeleton track → Metal Detector) and the secret-broken-phone beach spot in Misery Town |
| Metal Detector | Timesville shed after the skeleton track puzzle | Timesville beach, Misery Town movie tent, beach anomaly | Lockpick, Beartha's PGD, Projector Remote for the mime-room jump puzzle |
| Paper Pieces (×4) | Crawl holes in Henry's House, Chapter 1 | Binder on the mannequin in the closet | Rebuilding Scribbly's face, which gets the map from the toilet and unlocks Chapter 2 |
Telescope
A handheld telescope earned by consoling Paisley at the yellow party. It is one of the few items that pops up automatically with its own viewfinder UI when equipped.
Use the telescope by placing it near the small shed on the Timesville beach. Connect every star in the constellation to unlock the shed. Use the same telescope near the left dock to reveal a hidden sand patch that yields the broken phone after a Metal Detector scan.
Walkthrough Chapter 1 → PGD chain →Metal Detector
Earned from the skeleton-track puzzle inside the shed. Audible cues drive the prompt: walk around the beach and dig on the fast-beeping spots.
Use on the Timesville beach to dig up the lockpick, camera, fish paper, and PGD. In Misery Town, use it inside the movie tent to dig up the Projector Remote that reveals the mime-room jump puzzle.
Walkthrough Chapter 1 → PGD chain →Paper Pieces
Four paper scraps scattered in the crawl holes of Henry's House in Chapter 1. They are not consumed when assembled.
After collecting all four scraps, place them on the binder beside Scribbly in the closet. Use the pencil to sketch eyes and a mouth; the game auto-corrects the drawing. The resulting mannequin helps Mellow draw a map for the toilet.
Walkthrough Chapter 1 → Drawing a Map →Where to Find More Items
Several other items show up at least once in play: the Wrench, the Transparent Mug, the Black Rose, the Fish Paper, and the Plushie all rely on cross-chapter combinations. For a step-by-step route through each chapter, see the linked walkthrough and puzzle pages below.